ArchEditor Window
The ArchEditor is a simple application made of a starting screen and a main screen.
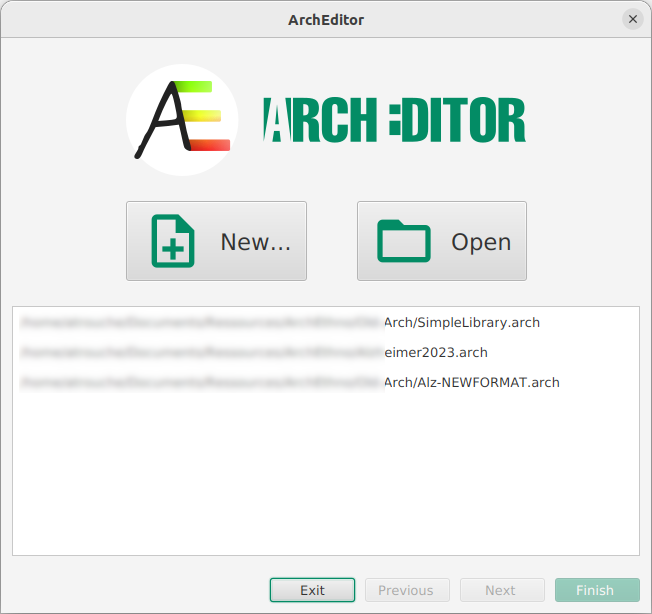
Welcome screen
When starting the application, the first screen offers two main possibilities: create a new Arch file or open an existing Arch file.
A list displays the Arch files recently opened with the application that can be opened directly.
|
Double-clicking on a recent file directly opens it. |
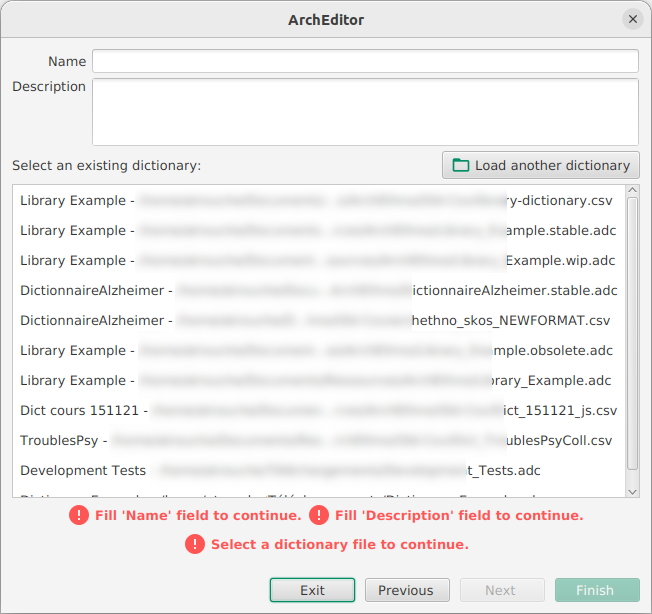
When selecting btn:[New…], a new screen appears as shown below.
On this screen it is necessary to provide a name and description for the new input to create.
Then it is necessary to select the dictionary of concepts that will be used for the new input to perform.
A list displays the previously used dictionaries to select.
Otherwise, by clicking on the  button, it is possible to select another dictionary file to use.
The bottom of the screen displays feedback on the currently entered informations. It also provide information on the status of the selected dictionary, see Dictionary status feedback for more details.
Then to start, click on the btn:[Finish] button.
When selecting the btn:[Open] option or selecting a file from the list of recent files, two options are possible:
-
Files created with newer version are directly opened;
-
Legacy files which need to provide the dictionary file implies the opening of the 'Legacy open' screen.
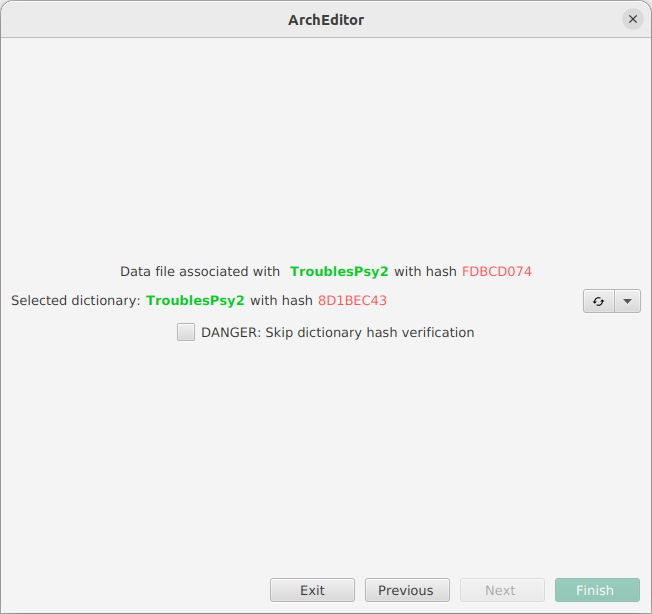
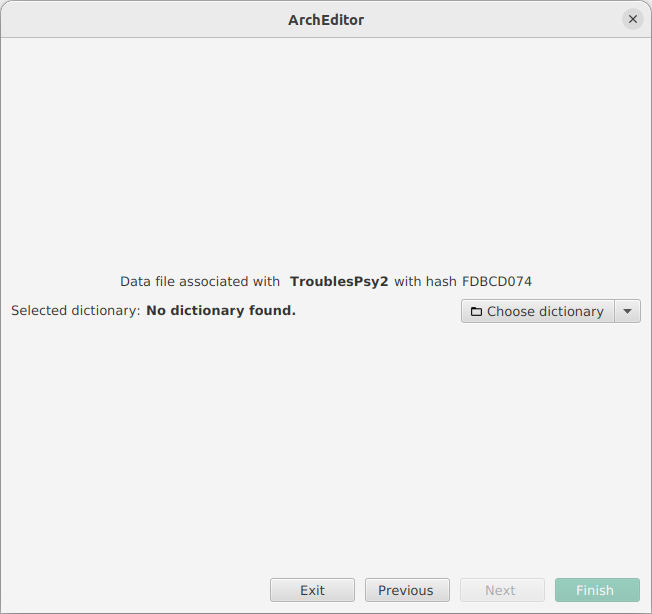
The 'Legacy open' screen is here to correctly load old Arch files. Indeed they do not contain the dictionary and need the path to the correct dictionary to be provided.
The application tries to find the associated legacy *.csv dictionary file.
It displays first the expected dictionary name and associated hash (on the example below, the expected dictionary name is TroublesPsy2 with hash
FDBCD074).
Then it looks in its already loaded dictionary files if one corresponds.
In the case shown below, a dictionary file of the correct name TroublesPsy2 but of incorrect hash 8D1BEC43 has been found.
In this particular case, an additional option appear btn:[Skip dictionary hash verification] with will ignore the fact that the provided dictionary has an incorrect hash. Be aware that this option may lead to loss of data if needed concepts are not present.
In case the dictionary was not found inside the history, the application waits for the user to provide it.
To do so, click on the
 button and select the correct dictionary.
To validate the selection, click on the btn:[Finish] button.
Main window
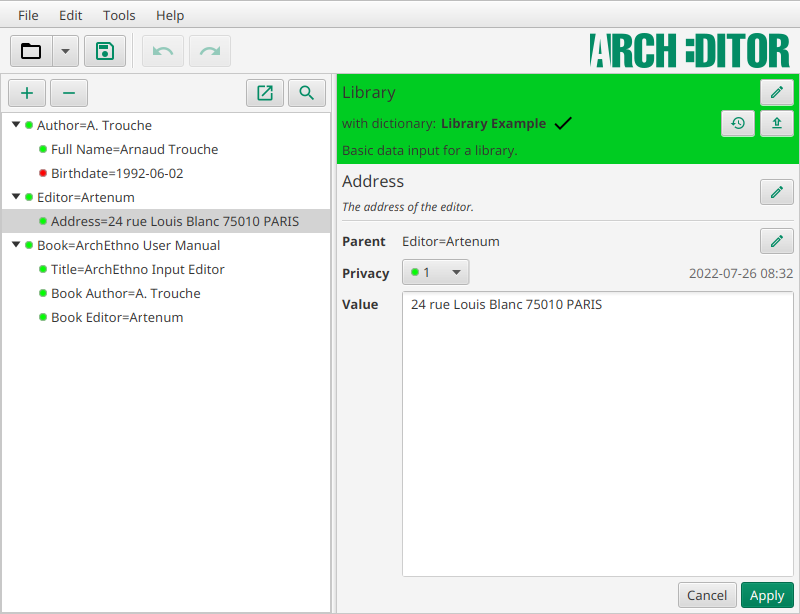
This is the main screen of the application. On the top, general application bars are present:
- Main Menu
-
It corresponds to main control menu of the application.
 Figure 6. Options of the main application menu bar
 - General Toolbar
-
It presents shortcut buttons to open and save a file and also buttons to undo/redo actions performed on the data, see Edit menu section for more information.
 Figure 7. Buttons of the main toolbar
Main menu
File menu
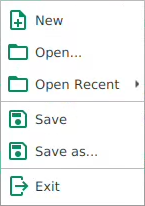
The menu:File[] menu allows opening and saving date files.An option also permits opening recent files.Finally the exit option enables leaving the application.
Please note that the application can only load one file at a time. When opening another file, if there are unsaved modifications, the application will propose to save this work before replacing it by the new opened file.
Inside the menu:File[Open recent] menu, at the bottom an option offers the possibility to clear the history of opened files.
Edit menu

The menu:Edit[] menu enables to undo/redo any action performed on an instance of concept in the main window.File actions such as create new, open or save cannot be undone or redone.
| The undo/redo function can only be used when modifications have been applied to the instance.Thus it cannot undo/redo modifications not applied inside the Instance editor panel. |
Tools menu
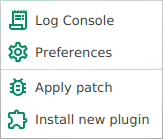
The menu:Tools[] menu offers various tools and shortcuts. From here, you can access the preferences panel presented in the Preferences section. The console log is displaying various messages from the application such as errors and warnings.
With this menu, it is also possible to apply corrective patch to the application or install new feature plugin. To do so, click on the correct item and a file choose will appear and asks where the patch/plugin is located. Once installed, it is recommended to restart the application.