Dictionary edition
The creation / edition of dictionaries within the application is performed in two steps:
- On the top, the Dictionary metadata
-
to provide information about the dictionary;
- On the bottom, the Concepts edition
-
to add / edit / remove concepts from the dictionary.
Dictionary metadata
The dictionary is a crucial part of the ArchEthno method and as such, it is very important to identify clearly the dictionary. It is the function of the dictionary metadata panel.

The various elements to be set for the dictionary metadata are:
- Name
-
The name of the dictionary, used to compute the name of the dictionary on the disk.
- Authors
-
The author(s) of the dictionary, pre-filled with the chosen username in the Edition preferences.
- Status
-
The status of the dictionary represents the evolution of the dictionary. The
 button enables to select the status of the dictionary.
 - Description
-
The description should enable to provide more information about the dictionary than its name.
Additionally, the  button enables to see the history of changes to the current dictionary with each save performed displayed.
Concepts edition
The main part of the application enabling to define concepts is separated in two parts:
- On the Left, the Concept tree
-
displays all the concepts of the dictionary, representing the hierarchy;
- On the Right, the Concept editor
-
enables to edit the concept selected in the tree.
Concept tree
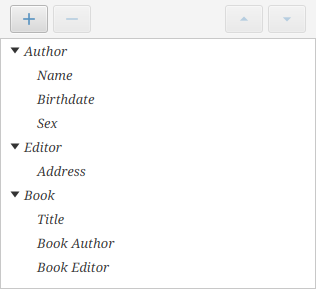
The tree displays the hierarchy of concepts. Concepts with "children concepts" can be expanded to see their children by clicking on ![]() .
.
On top of the tree, several buttons enables to interact with the concepts.
| Button | Action | Available |
|---|---|---|
|
Creates a new concept |
Always |
|
Removes / marks obsolete a concept |
A concept is selected |
|
Move the concept up |
A concept is selected and not at the top of the list of children of the parent |
|
Move the concept down |
A concept is selected and not at the bottom of the list of children of the parent |
| When creating a new concept, the currently selected concept is used as the parent of the new concept to be added. To add a concept as a top concept, it is necessary to clear the selection. |
Selecting a concept inside the tree enables to edit it in the Concept editor on the right of the application.
It is also possible to right-click on the tree to have access to some functions:
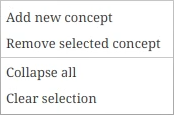
The first two elements have the same action that the corresponding buttons. Concerning the last two elements:
- Collapse all
-
Enable to collapse all elements of the tree, to only display top concepts.
- Clear selection
-
Enables to un-select the current concept, very useful to create a new top concept.
Concept editor
Selecting a concept inside the tree enables to edit it on the Concept editor panel on the right of the main view.
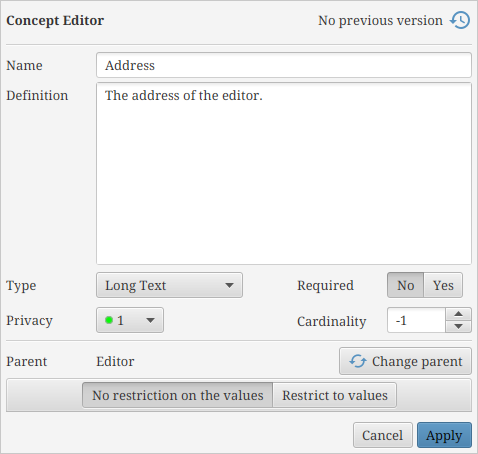
The main fields of the concept editor are:
- Name
-
The name of the concept, shorter and clearer name are preferred
- Definition
-
The description of the idea behind the concept. No limitation on the length of the definition, the best definition are the more detailled.
- Type
-
Defines the type of data that can be inserted into an instance of the concept. See the Types glossary for more information.
- Required
-
Indicates if this concept is considered as primordial for the input or not. It is more an indication than a real enforced requirement.
- Privacy
-
Indicates the expected privacy for this concept. It will only impact the default privacy when creating an instance of this concept, the final privacy choice will be made when creating the input data file.
- Cardinality
-
Indicates the number of instances of this concept in the same parent. This is also an indication if there can be several instances of the same concept or not, this is not enforced in the ArchEditor. The special
-1values indicates that any number of instances of this concept can be created, otherwise a stricly positive value indicates the maximum number of instances for this concept inside the same parent.
An additional row indicates the current parent of the concept or Top Concept for concepts without parent. It is possible to move a concept in the hierarchy by changing the parent when clicking on the  button.
| Do not forget to click on Apply to validate the changes performed on the concept. |
Restricted values
On the bottom of the concept editor, a toolbar enables to select whether the possible values of the concept will be limited or not. By default, any value can be entered for an instance of a concept, that’s why the No restriction on the values is selected by default.
To restrict the possible values, select the Restrict to values button and the restricted values panel will deploy.
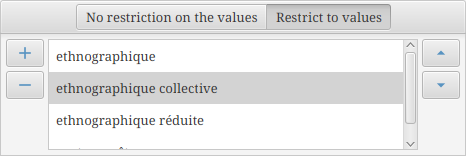
It is possible to add / remove a restricted values by using the  and
and  buttons. The order of the values can be changed with the
  and
and  buttons.
When passing the mouse cursor above a value, a ![]() icon appears. Clicking on it enables to change the text. It is also possible to edit the text by double-clicking on it. Then, two new buttons appear to cancel or validate the edit:
icon appears. Clicking on it enables to change the text. It is also possible to edit the text by double-clicking on it. Then, two new buttons appear to cancel or validate the edit:  and
and  .
.